Javascript must be enabled to download our products and perform other essential functions on the website.

ionicons-v5-m
ionicons-v5-j
Buy Now Download Free Trial
ionicons-v5-m
ionicons-v5-f

Configuring the Satellite Monitoring Service

To configure the Satellite Monitoring Service
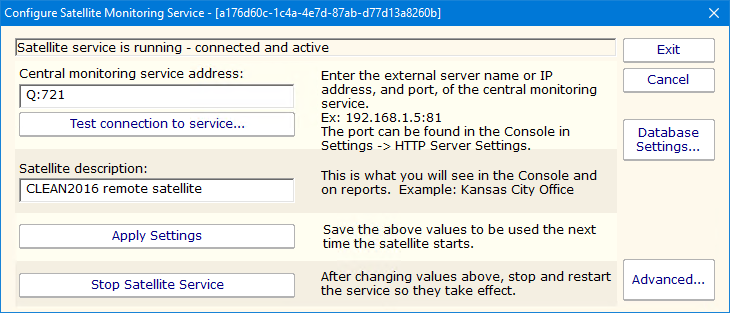
Configuring Satellite Monitoring
  1. Enter the computer address and port of the Central Monitoring Service in the Central monitoring service address box. This was determined during the Installation Prerequisites.
  2. Click Test connection to service. The Success window appears if the the connection is successful. If there is a problem, several troubleshooting tips will be shown to help fix the problem.
  3. Click OK to close the Success window.
  4. Enter a name in the Satellite description box.
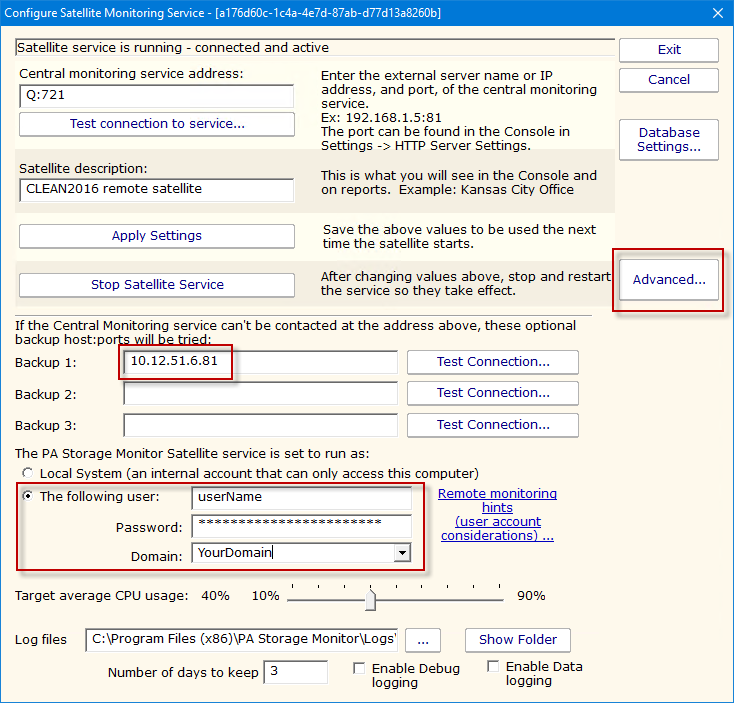
  5. If there are multiple network paths to the Central Monitoring service, you can give additional addresses for the server. Click the Advanced ... button which will display three additional places for host:port settings. Any time the Central Monitoring service can't be accessed using the primary host:port settings above, each of the Backup host:port settings will be tried to try and find a connection to a Central Monitoring service. This is useful if you are using Automatic Fail Over as it allows the Satellites to find the Fail Over Slave server if the main Central Monitoring Service is down.
  6. Click the Advanced ... button which will display settings for the Satellite Monitoring Service. It is recommended to have the service use an account that has access to the computers that it will be monitoring. The default Local System account cannot access remote computers. See Remote Monitoring Account Hints for more information.
  7. Advanced Configuring Satellite Monitoring
  8. Click Apply Settings to save your changes.
  9. Start a Console GUI, and then connect the console to the Central Monitoring Service. The main PA File Sight Console window will appear:
  10. Click Satellites Services in the left navigation panel, and then select the Satellite you just installed. If it is not displayed, wait a few moments and then click the Satellite Services node to refresh the list.
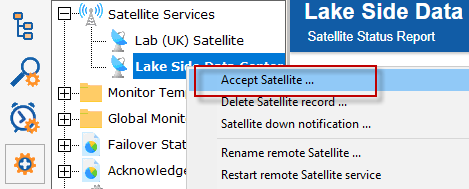
  11. Right-click the Satellite that was just installed, and select Accept Satellite.... This will allow the Satellite to connect to the Central Monitoring Service.
Accept Satellite

Now that the Satellite is connected to the Central Monitoring System, the system will add the computer to Servers/Devices in the Navigation Panel. You can now add and configure monitors on that computer via the Console just like you would add a monitor from the Central Monitoring System.

PA File Sight

Help Map