- Solutions
-
- File Server: Ransomware Protection
- File Server: File Copy
- File Server: Audit File Access
- File Server: Storage growth reporting
- Licensing/Pricing
- Contact
All monitors have an Advanced Monitor Options button on their right side. When you press that button you'll see the dialog below. This dialog is shown for a monitor that supports all advanced options. Others might not have all tabs when a particular feature is not relevant to that monitor.
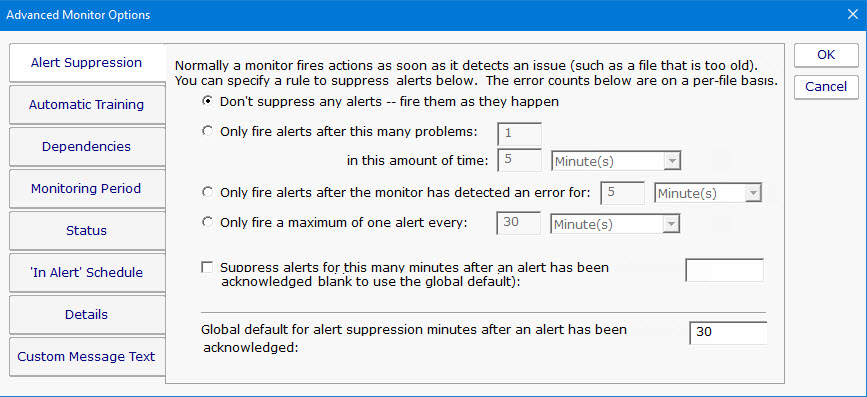
Each of the different option tabs is discussed below.
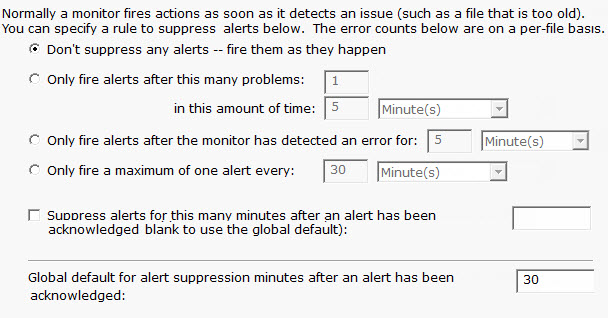
With the Alert Suppression settings, you can instruct the monitor how often and how soon you want to be alerted about a specific issue. This enables the monitor to skip the first few failures on a specific device if you wish and only warn after an error has happened a few times or for a particular amount of time.
Alert Suppression settings can be set on many monitors at once using Bulk Config, as can the other advanced options.
See Alert Suppressing, Event Escalation and Event Deduplication to see how these features can be used together for suppressing alerts.

PA Storage Monitor can have a monitor train itself. What that means is it will monitor like normal during the training period, but not fire any alerts. Anytime something 'abnormal' (or outside the normal thresholds) is seen, the thresholds are adjusted such that it won't alert on that activity if it is seen again.
At the end of the training period, the monitor will automatically switch back to normal monitoring mode. If you want to force it to switch back immediately, press the End Training Period button.
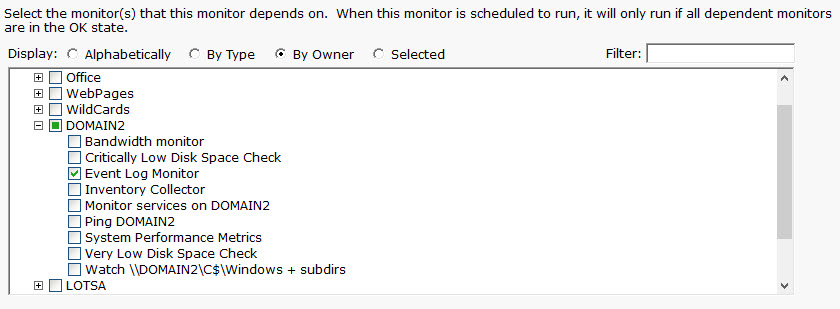
Monitors can be dependent on other monitors. That means when the monitor you are currently editing is supposed to run, it will first check its dependent monitors. They need to all be in the OK state for the current monitor to run. This is useful for suppressing errors. For example, the monitor that checks disk space on a remote server might be dependent on a Ping monitor that is making sure connectivity to the server is possible.
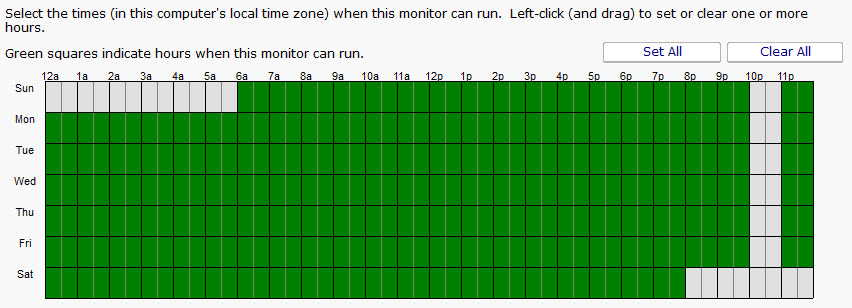
Most monitors run all day, every day, on the specified schedule. Some times though you might have a need for a monitor to not during a certain time. If you don't want any monitors to run at a certain time, put the server in maintenance mode. But sometimes that isn't granular enough -- you just want a single monitor to not running during a specific period of time. That is where the Monitoring Period option is useful.
The dark green boxes indicate times the monitor can run, and the light gray boxes are times when the monitor will not run.
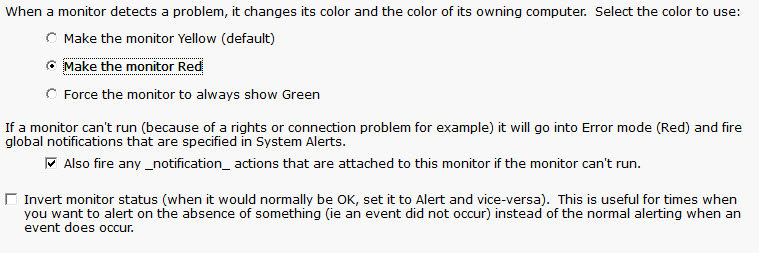
The Status panel lets you configure how some monitors appear when they are in an alert state. Sometimes a monitor is not important (informational only) and it going into alert mode should not make the server status and group status turn Yellow. The Status panel lets you override those behaviors.

This panel will allow you to change the scheduling of the monitor when it is in alert mode. The schedule of the monitor can be escalated by selecting on of several option in the dropdown box.

This panel lets you set the monitor's name as it is displayed through the system. If you want to go back to the default name that was generated, just delete the name text completely.
Many of the actions (E-mail, Pager, Message Box, etc) let you customize the message that is sent out when actions are fired. You customize the message
by using pre-defined variables. One of the variables is $MonitorMsg$. This is a value that can be defined on a per-monitor basis. Some uses would include
a hint to the receiver about how to fix the error, or directions to call various support phone numbers.
