- Solutions
-
- File Server: Ransomware Protection
- File Server: File Copy
- File Server: Audit File Access
- File Server: Storage growth reporting
- Licensing/Pricing
- Contact
The E-mail Message Action is the standard way for monitors to notify you via SMTP email messages. This allows for typical email messages as well as messages sent to cell phones and pagers if your cell/pager provider has an SMTP gateway (most providers do). There are some hints about that in the SMS FAQ.
To configure this action, give the target SMTP email address. You can add multiple email addresses (comma separate them) for sending alerts to the same addresses, and/or create multiple E-mail Message Actions and attaching them to different monitors for more customized alerting.
E-mail alerts are always sent from the Central Monitoring Service. In the case where a monitor running on a remote Satellite detects an issue and runs an attached E-mail Message Action, the alert message will be sent to the Central Monitoring Service for ultimate delivery.
There are two ways to send a message: Direct, or via a standard SMTP server.
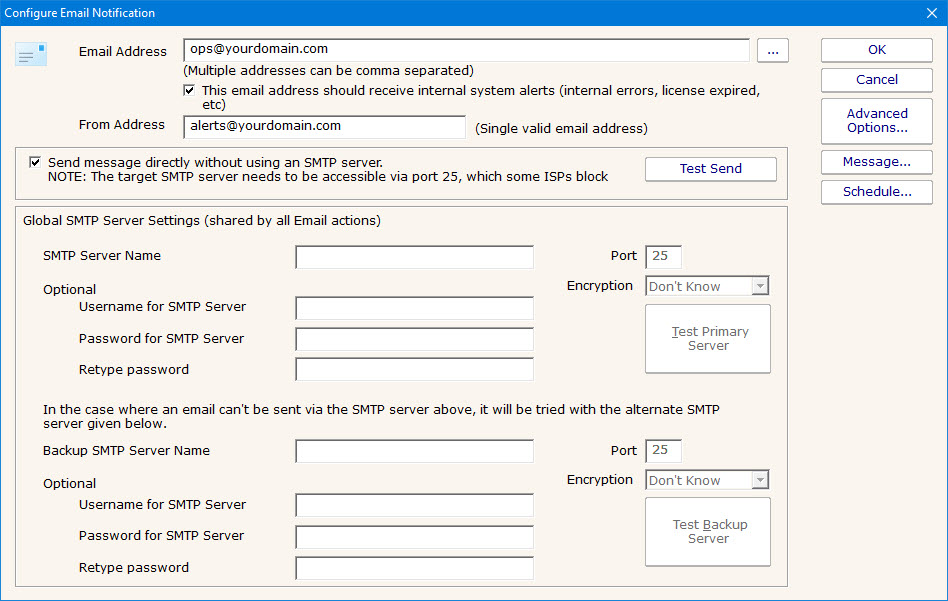
PA Server Monitor can act like a simple SMTP server and send messages directly to the recipient's receiving SMTP server. That means a connection to the destination server via port 25 needs to be possible (sometimes Internet Service Providers block outgoing port 25 to help limit spam, but if PA Server Monitor is on the same network as your mail server, it will probably work). The other requirement is that an MX DSN lookup returns a name for the target mail server that is resolvable from the machine hosting PA Server Monitor.
The easiest way to determine if all the above requirements are met is to just try it. Click the "Send message directly..." checkbox and then press the "Test Send" button. If the message is successfully sent, the configuration is complete. If it is not sent, uncheck the checkbox and continue to configure the SMTP server settings.
SMTP server settings are shared among all E-mail Message Actions. You can specify a primary SMTP server and a backup which will be used if sending via the primary fails. Unless using Direct Send, a primary SMTP server must be specified; the backup is optional.
The settings for each SMTP server (primary and secondary) can be validated by the program. You can do this by pressing the "Test Primary Server" and "Test Backup Server" buttons respectively. This test sends a short email message as a test to the email address(es) that were entered in the "Email address" field at the top of the form. If sending the email succeeds and you successfully receive the message, then the SMTP server settings that you have entered are correct. If the message is not received but you are sure the settings are correct, see the Troubleshooting Missing Email Alerts FAQ for help.
The E-mail Message Action supports using SSL for logging into the SMTP server. If you don't know which SSL option to use, leave the setting on Don't Know -- the Test button will figure it out for you.
Exchange
For sending via a Microsoft Exchange server, check the Exchange configuration to ensure SMTP relaying is allowed from the Central Monitoring Service computer.
Office365
For sending email with Office365 with "modern authentication" (OAuth 2.0) please see this help document.
GMail
To send alerts using a GMail account a security setting change is needed.
How To Enable Gmail Access
If email alerts are not showing up as expected, check out the Troubleshooting Missing Email Alerts FAQ for help.
The Advanced Options button will display the dialog below. Each of these options is specific to the E-mail Message Action that you are currently configuring.
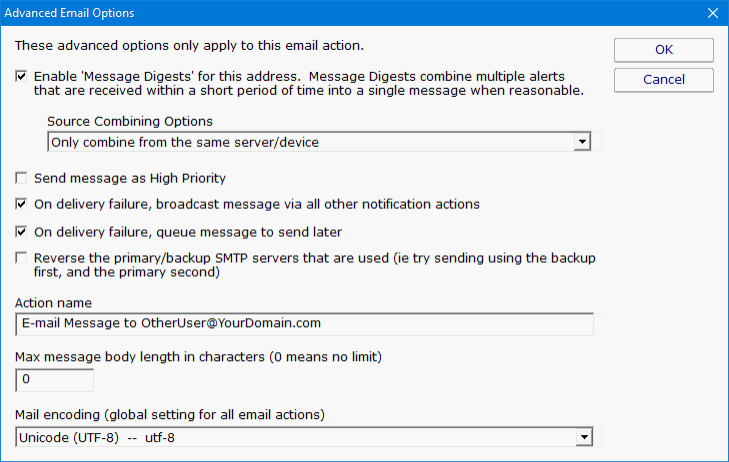
If the message will be going to a device with limited capabilities (perhaps a pager via SMS for example), you can specify that only the first 200 characters (for example) get sent.
Pressing the Message button displays the configuration dialog below. This lets you customize message text, select different templates to use, and to create new templates. This is most useful when sending alerts to devices like pagers and cell phones which might only accept the first sentence or two of a message. Also, having the abillity to use different message templates will help you get the right information to the right groups.
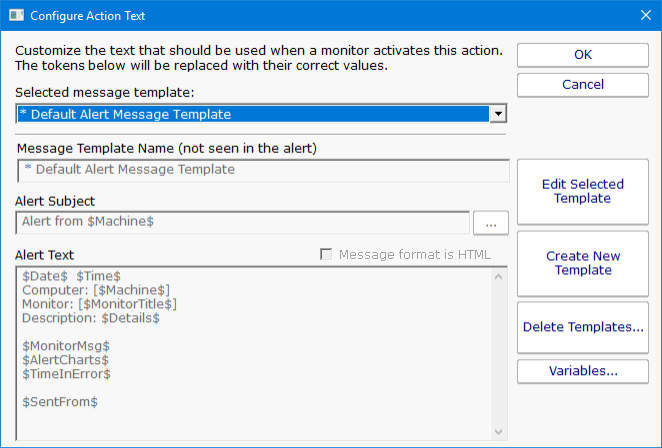
You can also specify specify that the message is HTML, and enter an HTML message template. Enclose the template in an <html> tag. Don't bother with a <head> tag as most email clients will strip it out.
Some good hints and tips about HTML email are available here: http://www.mailchimp.com/resources/guides/email-marketing-field-guide/
You can also rename the action as it shows up in the various action lists (for example to give the email action a group name). You can reset the action to its original/default name by simply clearing the name field.
A typical alert email could look something like this:
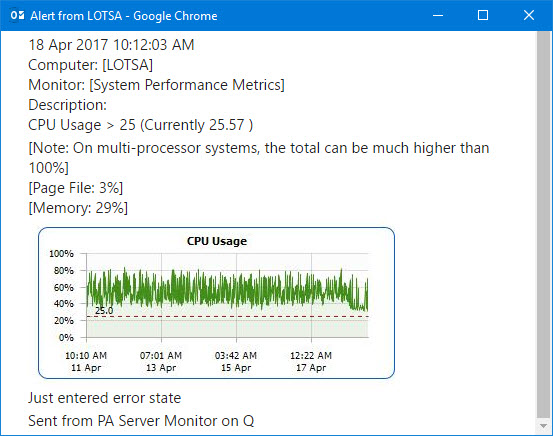
Note: Actual message content will vary depending on the product being used, and the monitor which fires the actions.
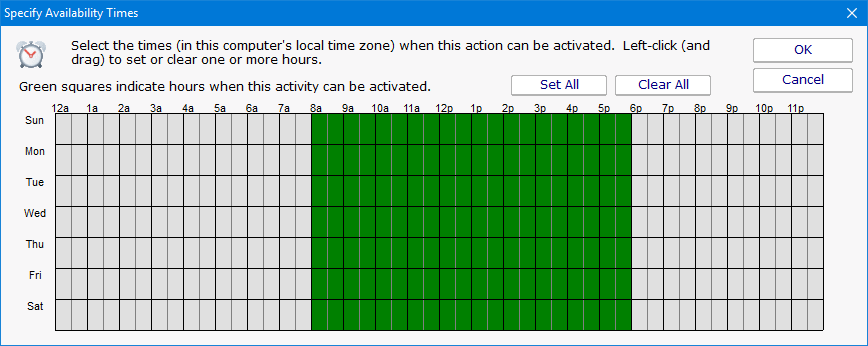
If the action should not be used 24/7 you can use the Schedule button to specify when notifications should be sent to the given pager. On off hours the action acts as though it isn't configured at all. The dark green below indicates 'on hours' and the lighter grey specifies 'off hours'.
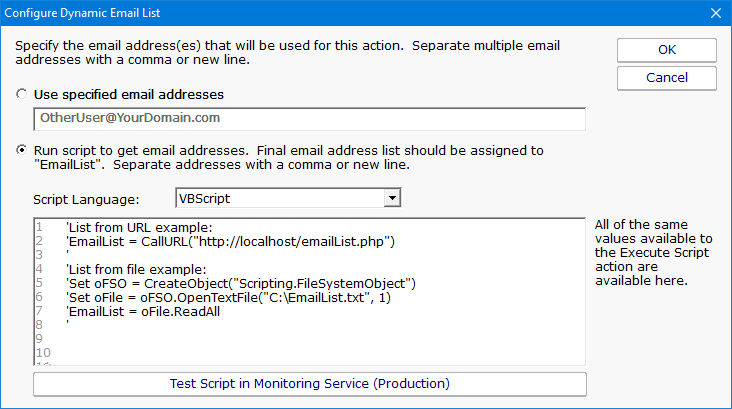
The Email Action can determine who to send the email to on the fly by calling a script. To access that feature, click the ... button next to the Email Address field.
Here you can specify a script that will run. The results of the script must be assigned to the variable EmailList, and should consist of a simple text string of one or more email addresses. Each email address should be on a separate line, or on the same line and separated by commas. The script can do anything you want to get the email list, like reading from a database, from a URL or from a text file. If the script determines that the email should not be sent, set the EmailList variable to the string "NO_SEND".
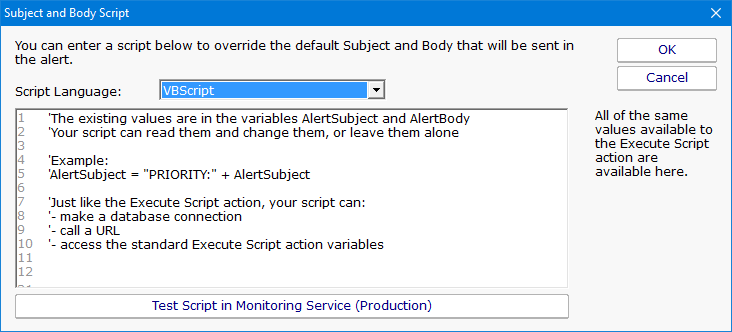
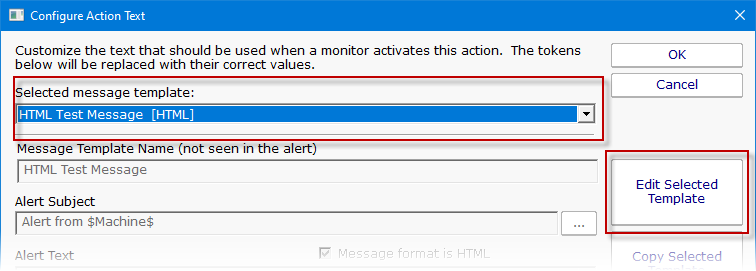
The Subject or Body of an email message can be changed on-the-fly as an alert email is going out. First select the templet to edit from the dropdown and then click on the Edit Selected Template button.
Then to access this script click the ... button on the Message dialog.
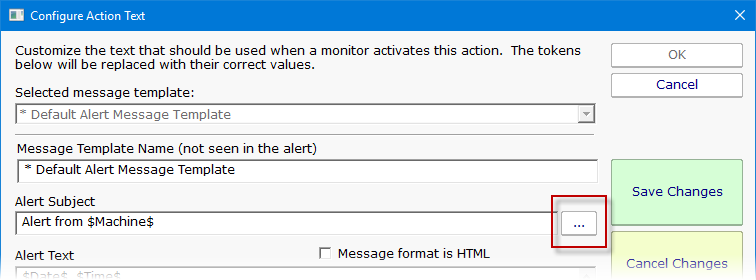
This script has access to all of the same values and functions as the Execute Script action has. Assign the final output to the variables Body and/or Subject. The variables are initialized with the current value to be used. You can change the value, replace it, or leave it alone.
