 Certificate Services has become one of the core components of any Active Directory infrastructure. A certification authority (CA) issues digital certificates to testify the authenticity of applications, users and computers. Digital certificates can be issued, revoked and renewed based on the necessities of the company. When deciding to deploy AD CS within your organization, you will need to take into consideration several factors:
What kind of CA are you going to deploy? – There are two CAs that can be deployed on a Windows Server: Enterprise CA or Stand-Alone CA. You should always opt for the Enterprise CA whenever possible because it offers increased capabilities. It integrates into AD and uses Group Policy to replicate certificate trust list to users and computers. Revocation lists are also published to AD, Auto-enrollment feature is supported, certificates are generated based on the information stored in AD and security checks are made when users send certificate requests. Most of these features are not supported by the Stand-Alone CA and all of these operations must be done manually by System Administrators.
There may be times in which you’d want to revoke certain certificates so that they are not trusted anymore. Information that a certificate has been revoked is published in so called certificate revocation list (CRL). The location of any CRL is included in the digital certificate so any entity can verify the validity of a digital certificate. You can specify a custom location for your CRL that is accessible by users and computers.
When publishing huge CRLs to a certain location, delays may occur when there is an increased usage of network resources. These problems may arise when numerous users try to login using smart cards or use digital certificates. To overcome this problem Microsoft created Online Responders which are used to validate request sent by network users. Instead of downloading huge CRLs, a user will send a request to the local OCSP service to verify the authenticity of an entity. You can deploy one Online Responder to verify the revocation status for one or multiple CAs.
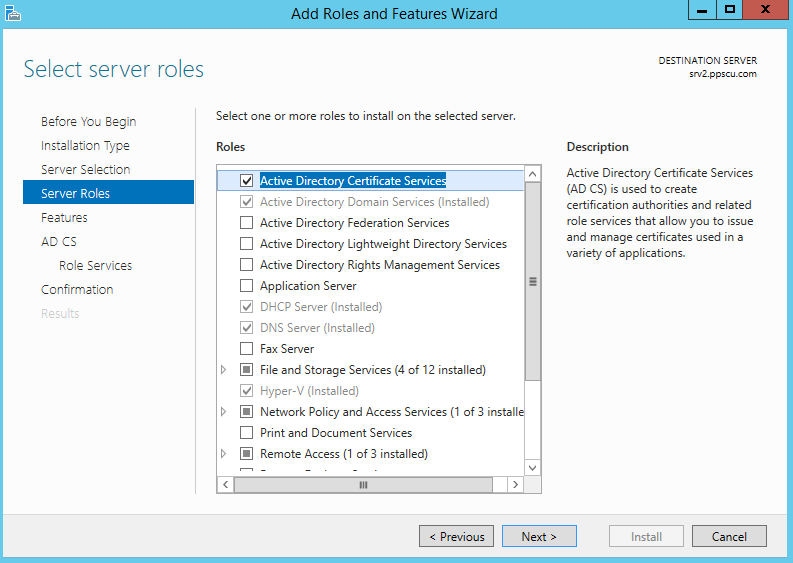
In this article we will learn how to install and configure an Active Directory Certificate Services and configure an Online Responder Server. For this demonstration I will be using a Windows Server 2012 Virtual Machine hosted in my VMware testing environment. Let’s start by installing the Certification Authority and Online Responder services. Log in on the server with Administrator credentials, open the Server Manager console and click on Add Roles and Features button. From the available roles list select Active Directory Certificate Services and click on the Next button:
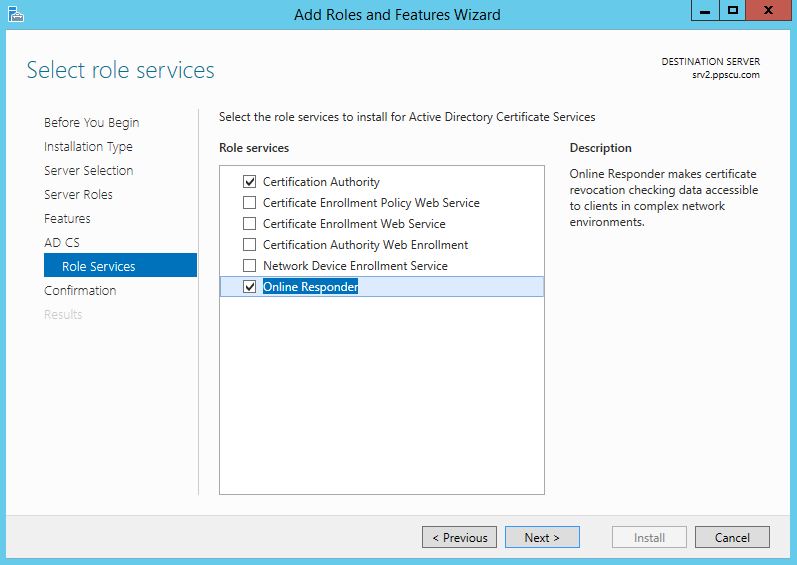
Make sure that Certification Authority and Online Responder services are checked:
Check out the confirmation page to ensure everything will be installed as desired and press the Install button. Once the install operations is completed you will need to start the post configuration Wizard from the Server Manager console. We will start by configuring the Certification Authority service. From the setup type of the CA, select the Enterprise CA and the Root CA since this is the first CA deployed in our PKI (Public Key Infrastructure).
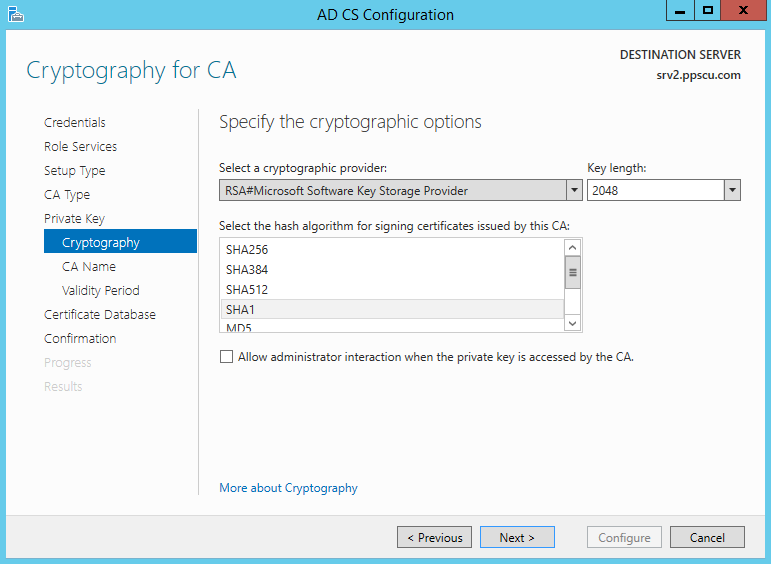
In the following section we will need to create a new private key, make sure that the RSA#Microsoft Software Key Storage Provider cryptographic provider is selected, that the key is set to 2048 and the hash algorithm for signing certificates is set to SHA1:
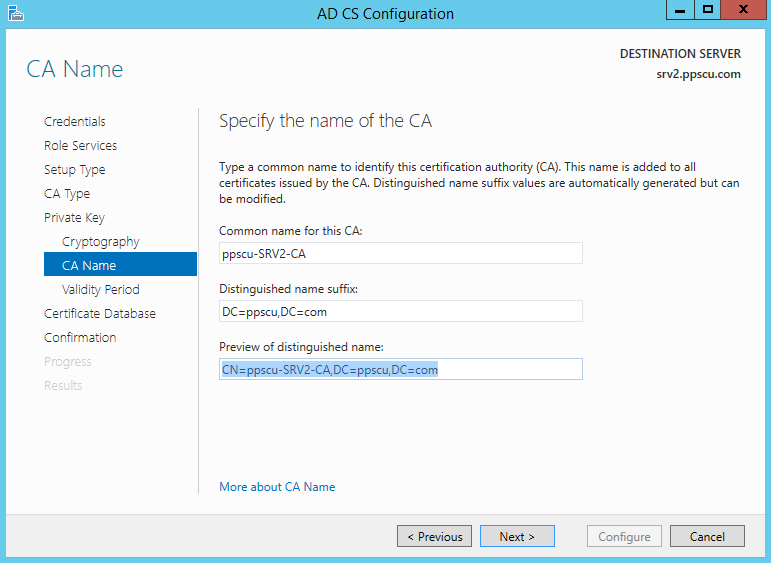
In the following section we have to specify the name for our Certification Authority. You can configure the common name and the distinguished name suffix:
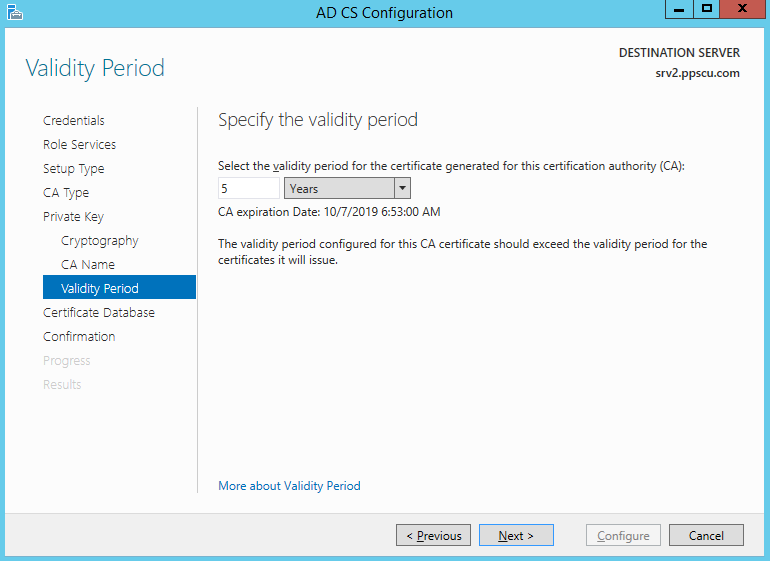
Set the validity period of the Certification Authority (CA) to five years or whatever period you desire:
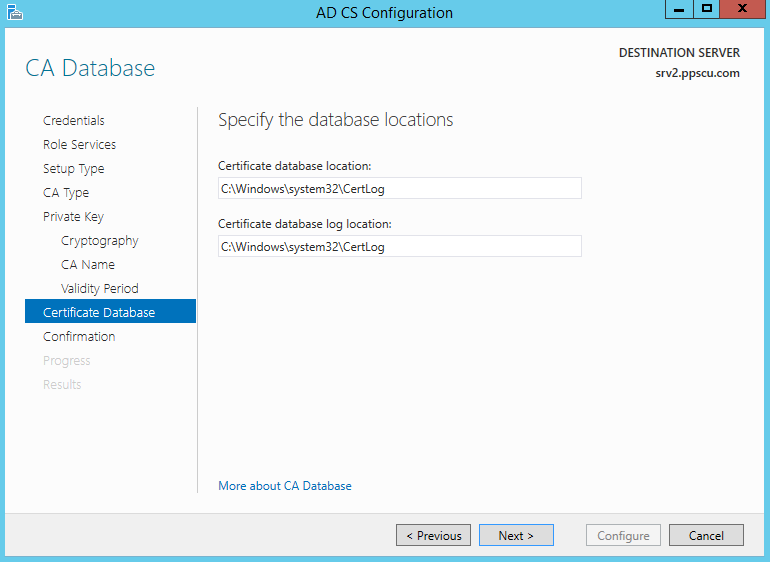
In the last section of the AD CS Configuration Wizard you’ll need to type in the certificate database location and certificate database log location:
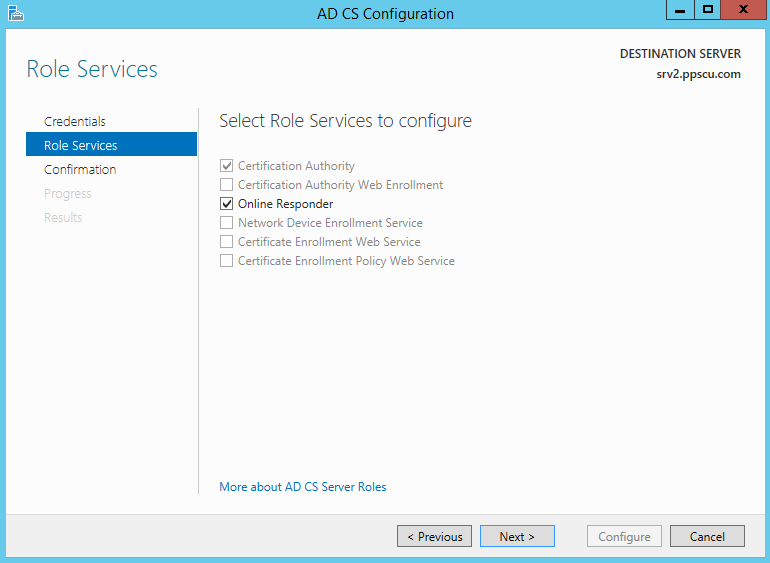
The configuration Wizard for the Online Responder is instant, you just need to start it and click on Configure:
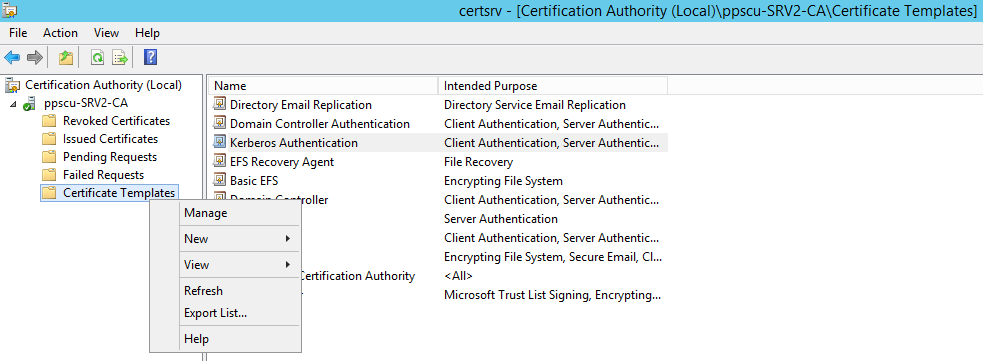
Once the OCSP service is configured, we need to configure our OCSP Response Signing template. Open Certification Authority console, navigate to the Certificate Templates section, right click it and select Manage from the menu:
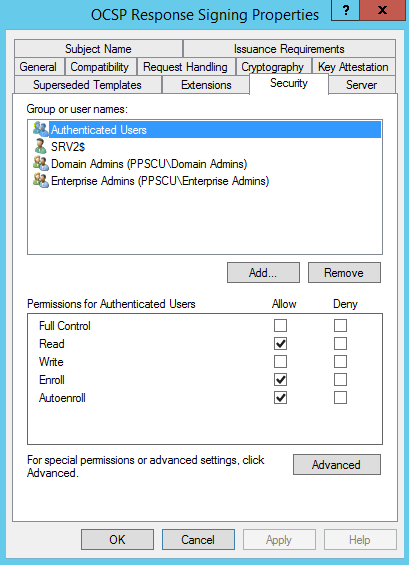
Now right click the OCSP Response Signing certificate and click on Properties. Navigate to the Security tab, add the Server hosting the OCSP service and set the permissions to Read, Enroll and Autoenroll.
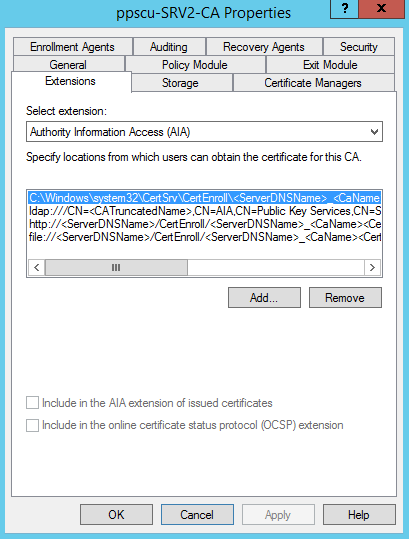
Return to the Certification Authority console, right click the CA name and click on Properties. Navigate to the Extensions tab, select Authority Information Access (AIA) extension and click on the Add button:
Type http://srv2.ppscu.com/ocsp, where srv2.ppscu.com is the FQDN of my OCSP server. Make sure to check Include in the online certificate status protocol (OCSP) extension:
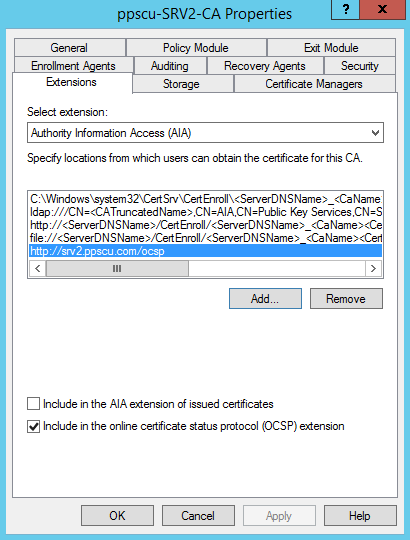
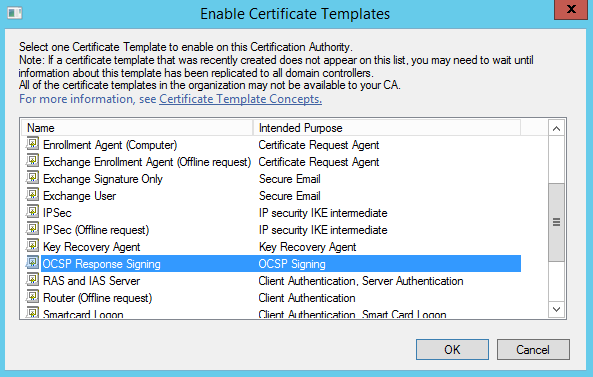
The CA will be restarted once the AIA extension is added. Return to the Certification Authority console, right click Certificate Templates and select New -> Certificate Template to Issue. From the available templates select the OCSP Response Signing template:
Our configuration is almost completed, we just need to enable Autoenrollment feature from the Group Policy Management Console. Edit the Default Domain Policy or create a new GPO and expand Computer Configuration/Policies/Windows Settings/Security Settings/Public Key Policies and enable the Certificate Services Client – Auto-Enrollment policy:
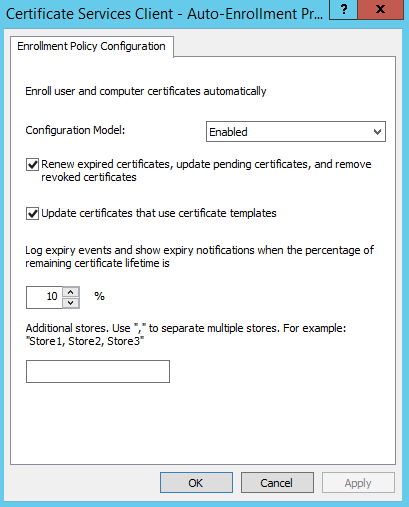
Once the policy is enabled, close GPM console and force a group policy update by typing gpupdate /force from command prompt. Your CA is now configured with an Online Responder enabled to service certificate requests. That’s about it for this article folks. Make sure you follow all steps precisely to be sure that your infrastructure will be configured accordingly. Please share your thoughts about this article and don’t forget to enjoy your day!
